How to Create an Ancient Egyptian Beadnet Dress
Posted On June 29, 2024
By Talia bint al-Athir, OP- Kingdom of An Tir
If you’re fascinated by ancient Egyptian fashion and want to create a beautiful beadnet dress, this instructional guide will walk you through the process step-by-step. Here’s everything you’ll need and how to put it all together.
Materials Needed:
- Beads (Faience or natural stone such as turquoise or lapis lazuli)
- Teardrop beads or shell beads
- Strong polyester thread or bonded nylon thread (natural or cream color)
- Long flexible needle
Instructions:
- Creating the Beaded Band:
- Decide whether to make the dress as a tube or flat with a back opening for a better fit.
- Measure around the chest below the breasts, adding extra length to ensure the dress can be pulled over the head and shoulders.
- Start with the vertical beaded band that goes under the breasts. Thread a needle on each end of the thread, using the longest double polyester thread you can manage (2-3 meters).
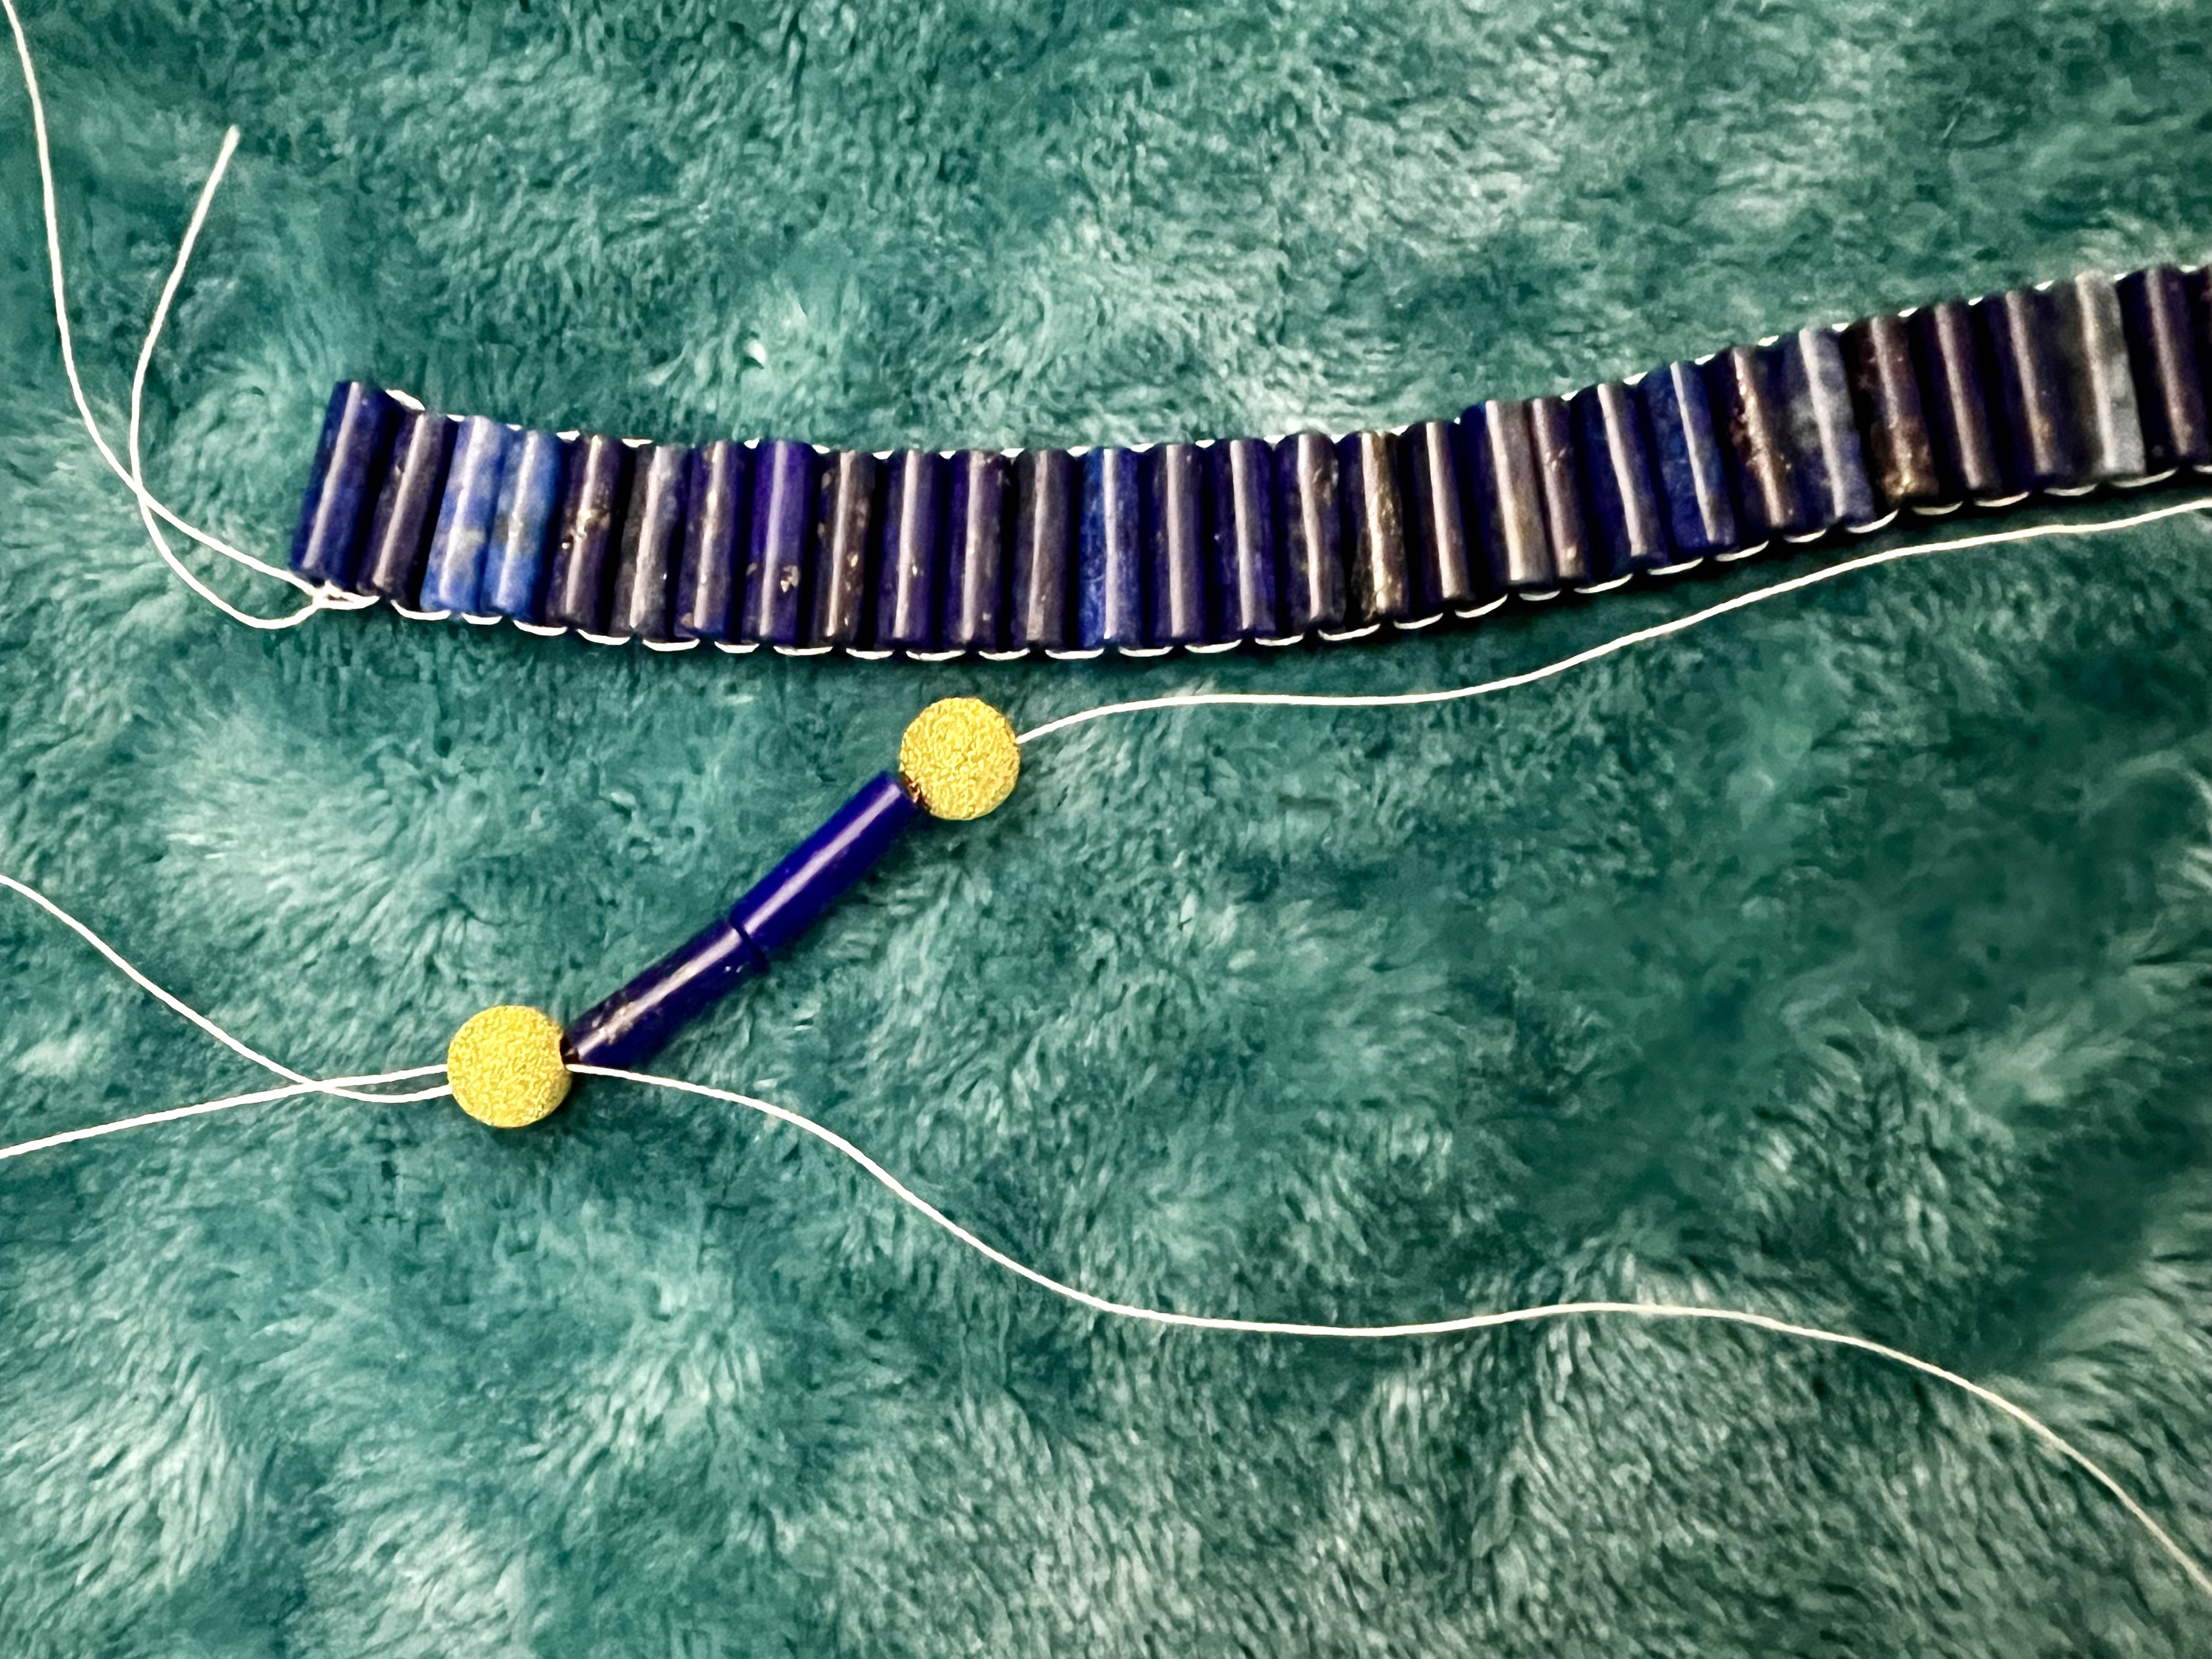
- Sew the beads together as shown in the diagram, using a ladder stitch. If you run out of thread, tie another length using a surgeon’s knot.

- Once the band is complete, knot the two ends together with a surgeon’s knot for extra strength.
- Sew the beaded band onto a strong petersham band covered with white fabric (preferably linen).


- Making the Skirt:
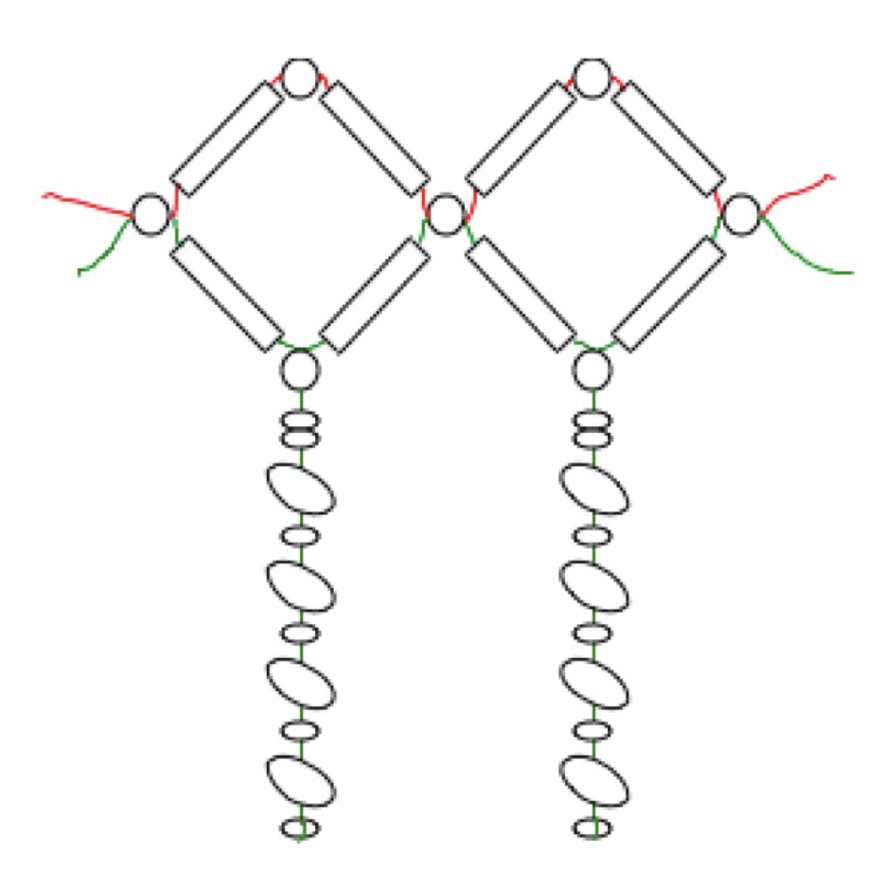
- Begin by sewing the first row of cylinder beads interspersed with round beads.
- Using one needle and a double thread (as long as possible), thread on one round bead, one cylinder bead, and another round bead.
- Attach this to the vertical beaded band by running up one vertical bead and down its neighbor, then come through the top round bead. Knot the thread to hold this pattern in place.
- Repeat this process, threading on one cylinder bead, one round bead, another cylinder bead, and one round bead. Measure along the vertical beaded band or count them, run the thread up a vertical bead and down its neighbor, and back through the top round bead as before. Knot the thread to secure the pattern and pull the thread tightly as you go.

- Adding Additional Rows:
- For the second and subsequent rows, use the same method as the first. Attach the new row through the bottom row of round beads, as shown in Diagram 2, and knot as you go.
- Creating the Teardrop or Shell Fringe:
- Thread the beads/shells and alternate with one or more tiny beads onto a double thread.
- Attach this fringe to the last row of the dress.

- Making the Straps:
- Create the straps using the same method as the dress. You may find it easier to use shorter cylinder beads and pin the first row of beads to a corkboard or thick polystyrene sheet to keep the work straight and under tension.
- Make two individual straps and sew each to the top edge of the vertical cylinder bead band at the front and back.
- Storing Your Dress:
- Lay the dress flat in a box for storage.
- When wearing the beadnet dress, avoid sitting down to prevent the beads from breaking.
By following these steps, you’ll create a stunning beadnet dress that captures the elegance and craftsmanship of ancient Egyptian fashion. Enjoy the process and wear your creation with pride!